 Connect your AWS Management account (formerly “master account”)
Prerequisites
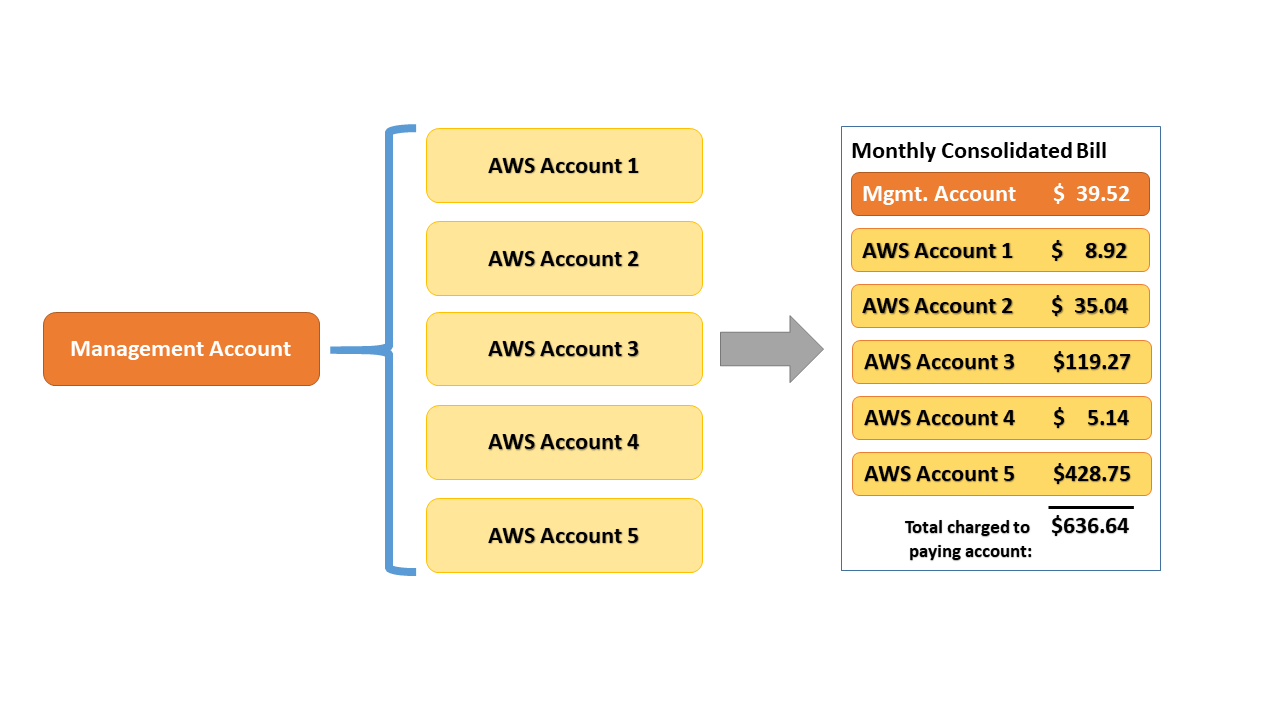
Step 1. AWS Organization: Use your existing AWS Organization with your AWS account or Create AWS Organization to setup consolidated billing to track the combined costs of all your AWS accounts. The following diagram shows an example of a consolidated bill.
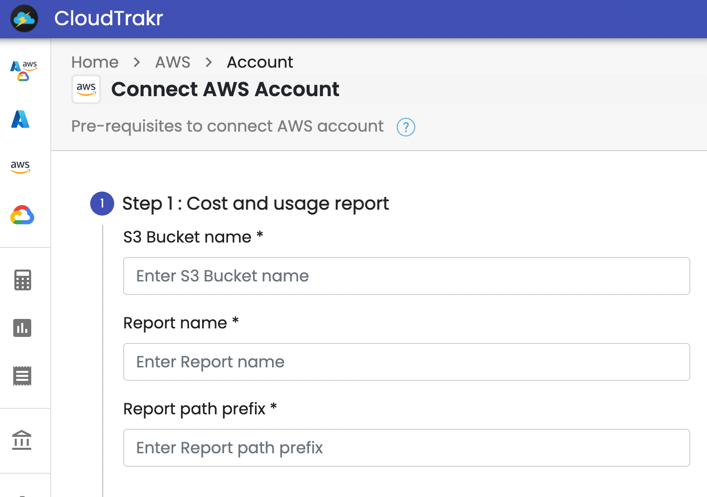
Step 2. Create Cost & Usage Report: Follow the steps in How to create cost and usage reports and create report in your AWS Billing and Cost management console using the following settings.
-
Additional Report Details: Select Include resource IDs
-
Data refresh settings: Select Automatically refresh your Cost & Usage Report when charges are detected for previous months with closed bills
-
Time granularity: Select Daily
-
For Report path prefix, enter the report path prefix that you want prepended to the name of your report.
-
Report Versioning: Select Overwrite Existing Report
-
Do NOT Enable report data integration for
-
Compression type: Select GZIP
You need to enter the S3 bucket name and Report name to connect your AWS account in CloudTrakr application.
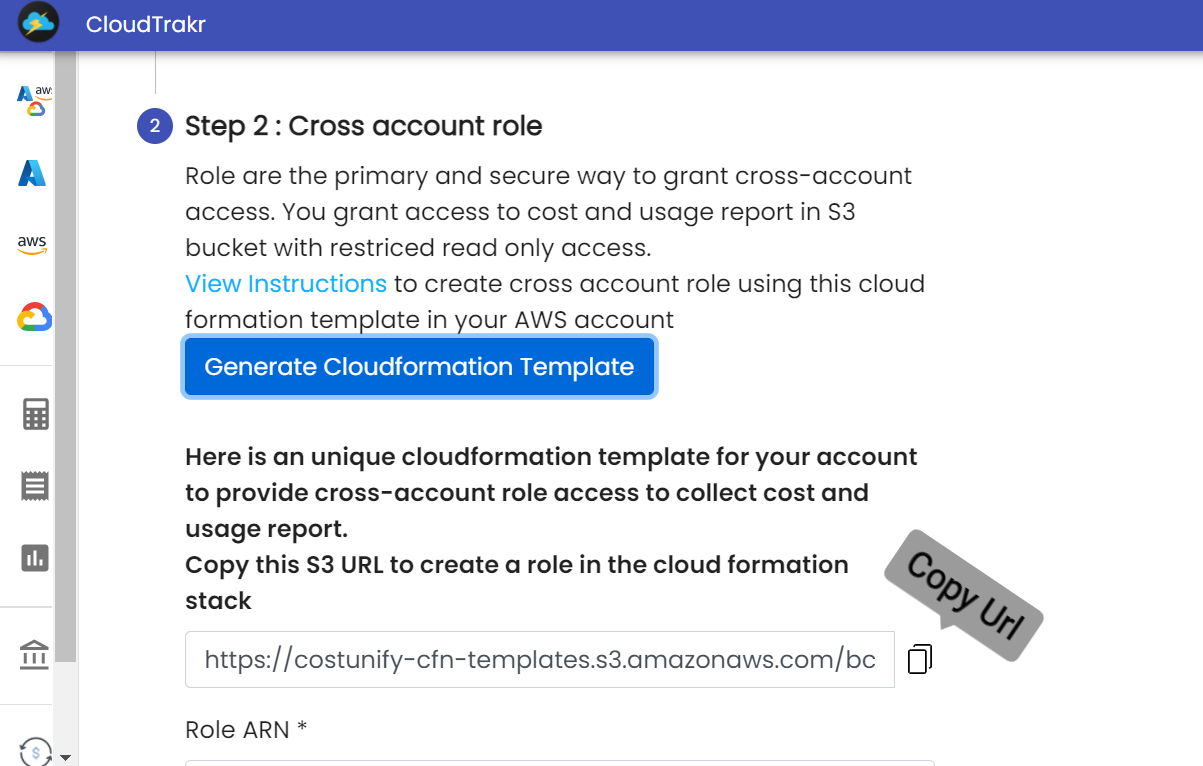
Step 3. Create Cross-Account IAM Role:
AWS recommends using cross-account IAM role to securely access the cost and usage reports and read-only resources to help analyze your costs. You can use IAM roles to delegate access to your AWS resources. With IAM roles, you can establish trust relationship between your trusting account and our AWS trusted account. In addition, we use a unique external ID for your account to securely access your read-only resources.
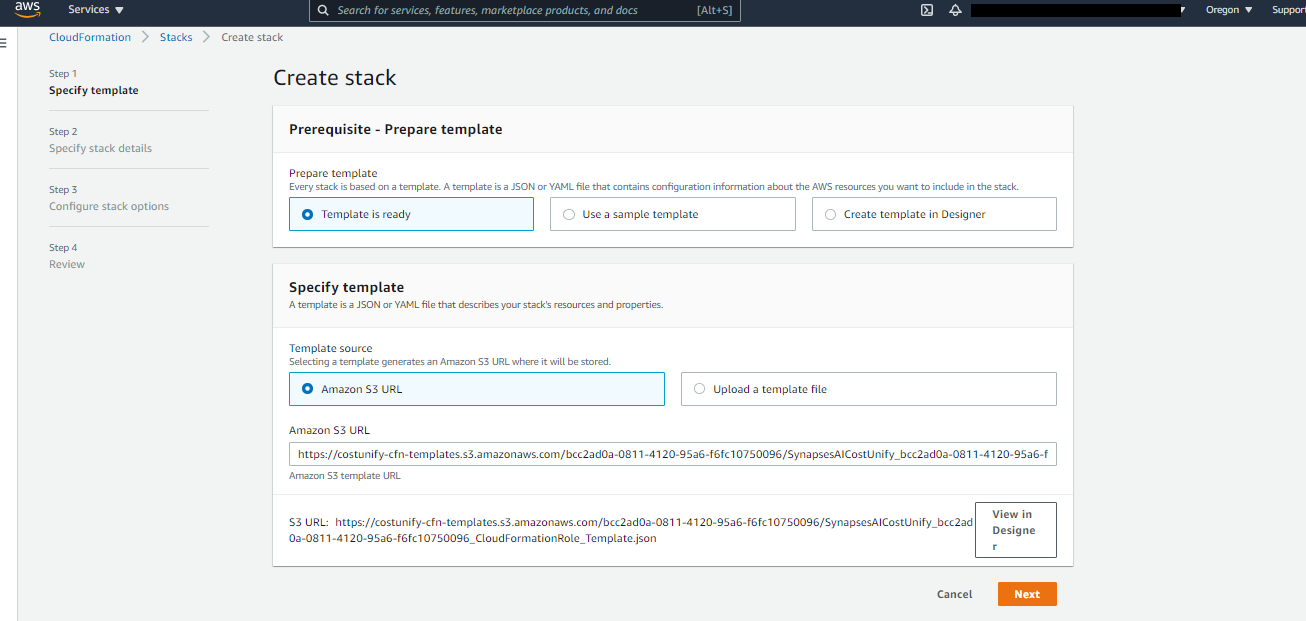
You can create a cross-account IAM role manually in your AWS console, but we recommend using the CloudFormation template generated for you dynamically using your S3 bucket and cost report name created in the previous step. We provide the CloudFormation JSON template in the Amazon S3 URL.
Connect to AWS Account
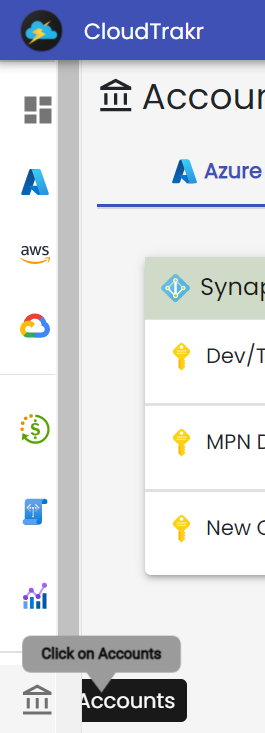
- In CloudTrakr, click on Accounts
- Click on Connect AWS

- Enter S3 Bucket name, Report name and Report path prefix
- Now Generate Cloudformation Template, click on generate Cloudformation Template
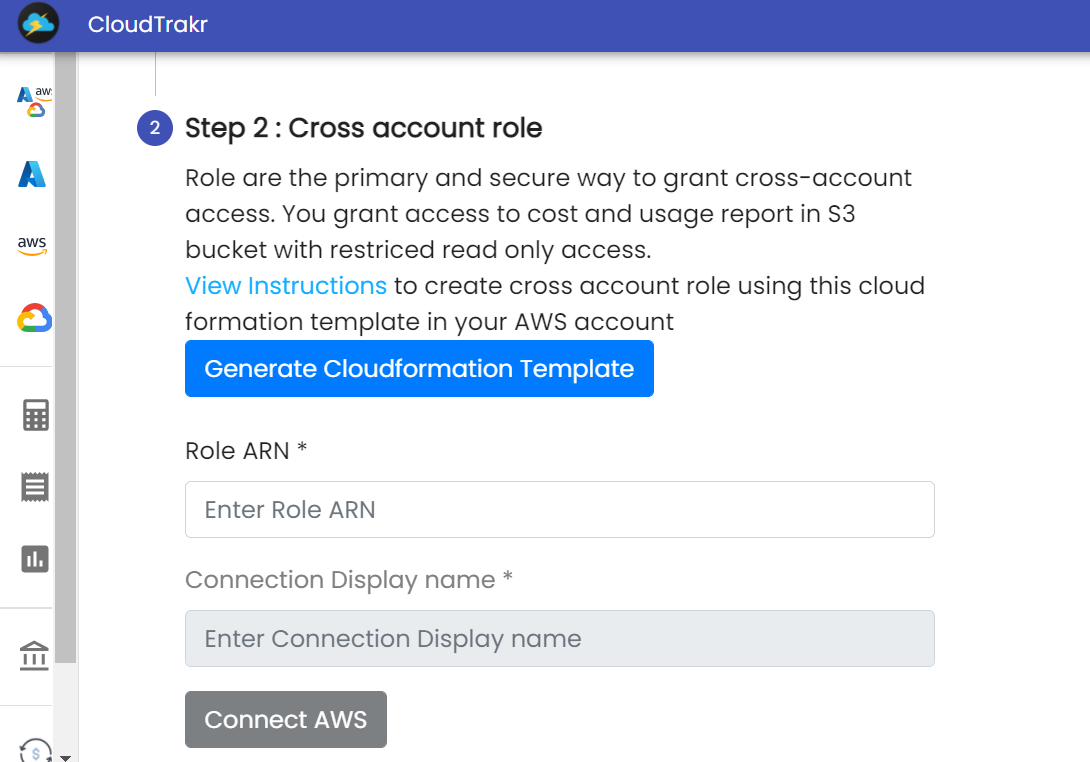
- Copy this S3 url to create a role in the cloud formation stack
Step 4. Now, In AWS services search Cloud formation: https://console.aws.amazon.com/
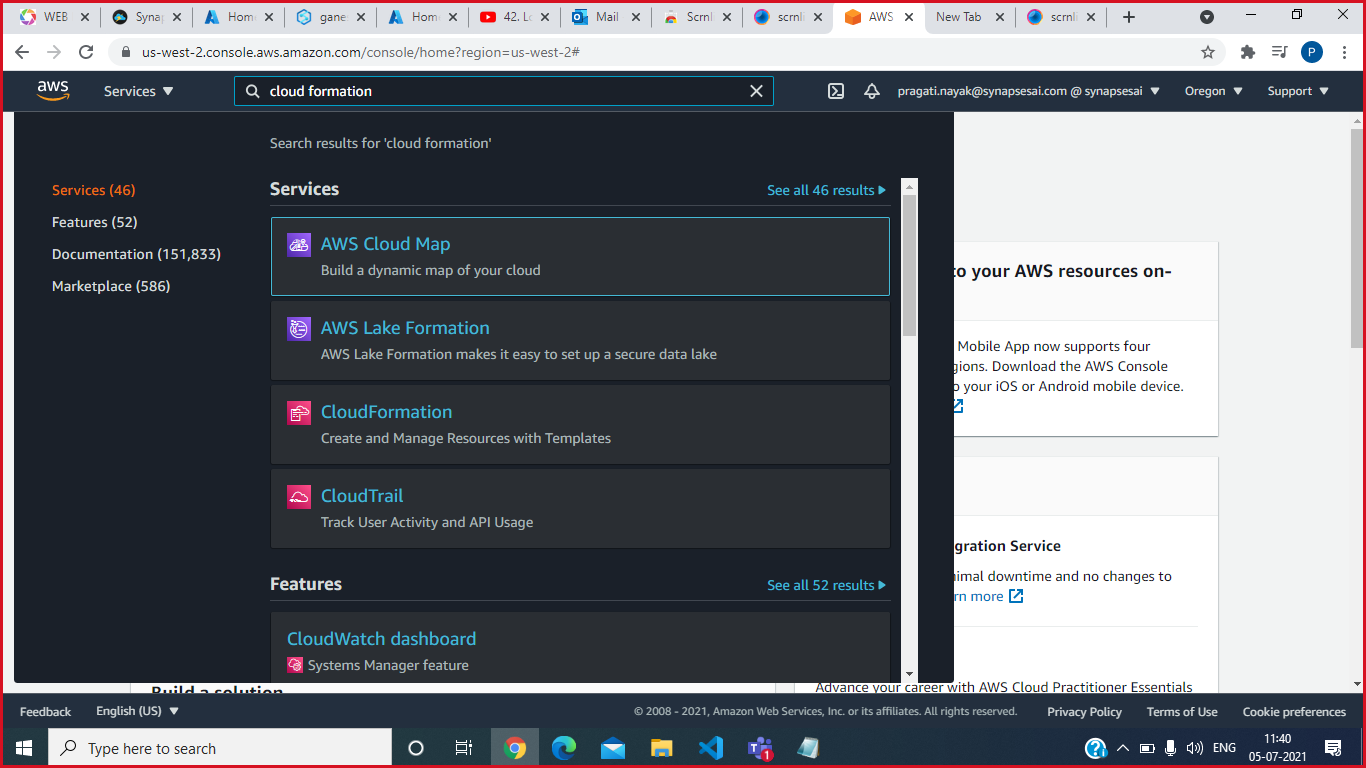
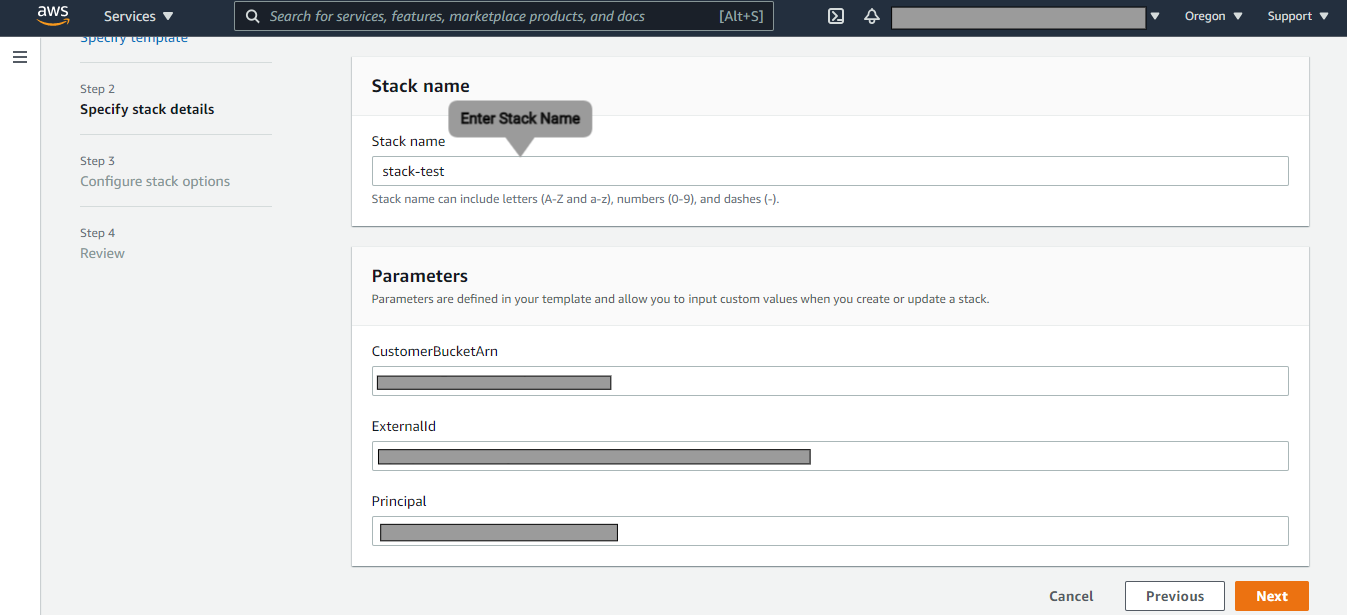
You can select Amazon S3 URL in Specify template and use the S3 URL generated dynamically for your AWS account. Here are the 3 required stack parameters
-
CustomerBucketArn: Verify the S3 bucket name configured in the cost and usage report.
-
ExternalId: Do NOT change this value. This is dynamically created for you to securely access the read-only resources.
-
Principal: Do NOT change this value. This is our AWS account that you are providing cross-account access to get cost and usage reports from the S3 bucket.
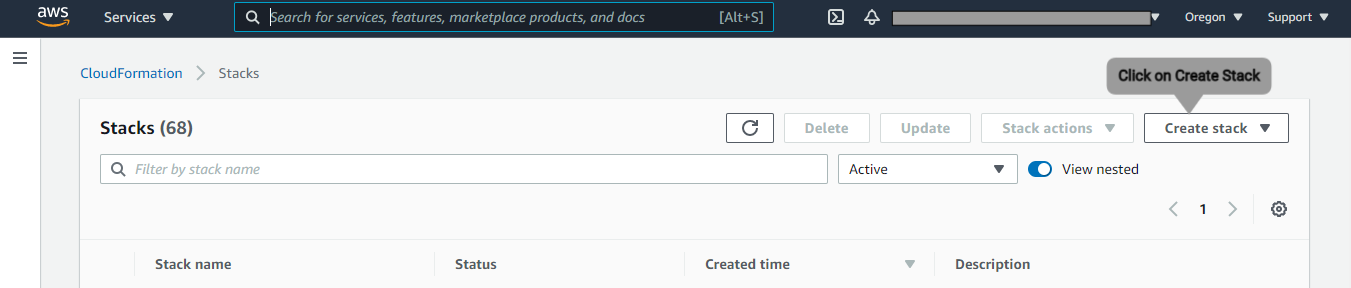
Acknowledge and create the stack. It will take couple of minutes to create the IAM Role and shows the status as “CREATE_COMPLETE”.
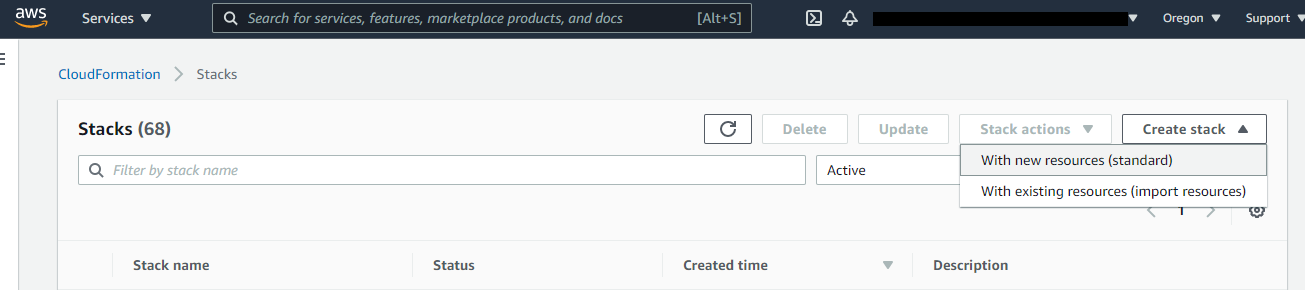
- Click on Create stack
- After clicking select new resources or your existing resources
- Create your Stack
- Specify stack details
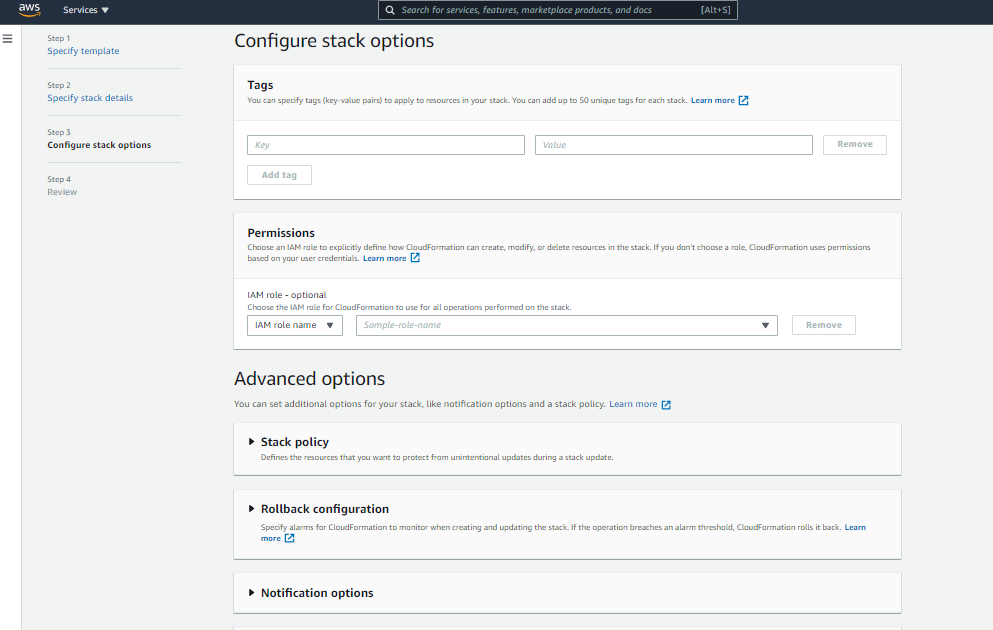
- Configure stack options, click on next
- In Review, checked on acknowledge and create your stack
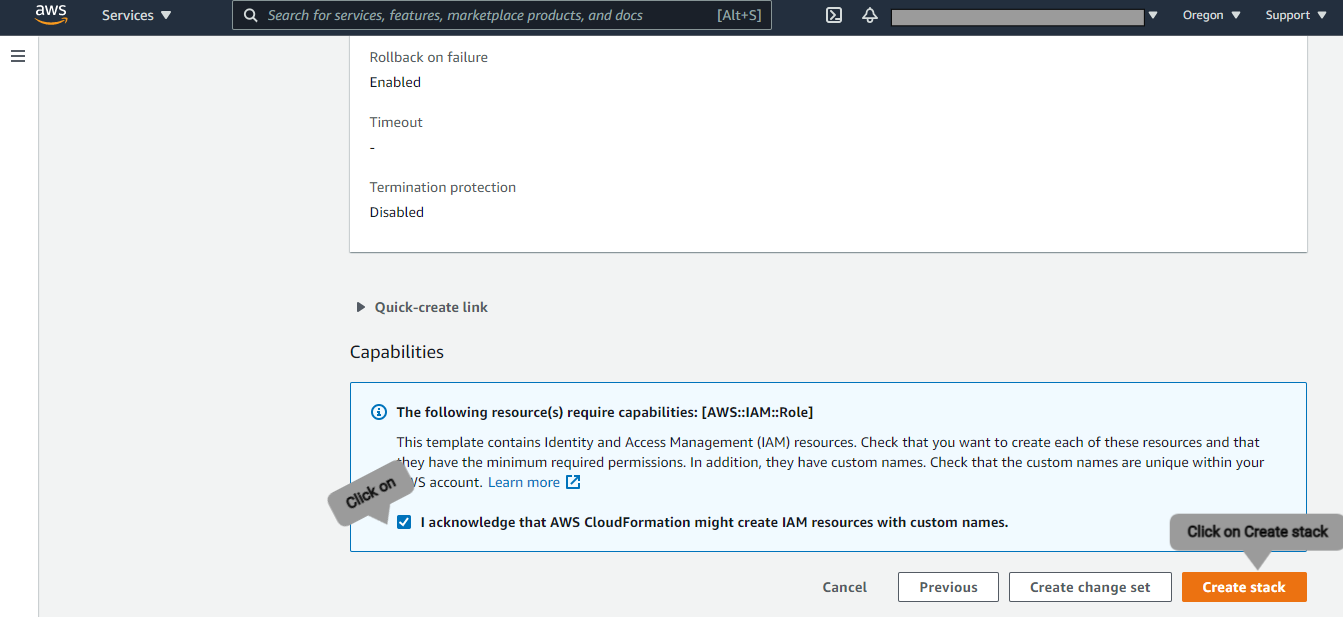
- Now stack is created go to resources and click on Physical ID
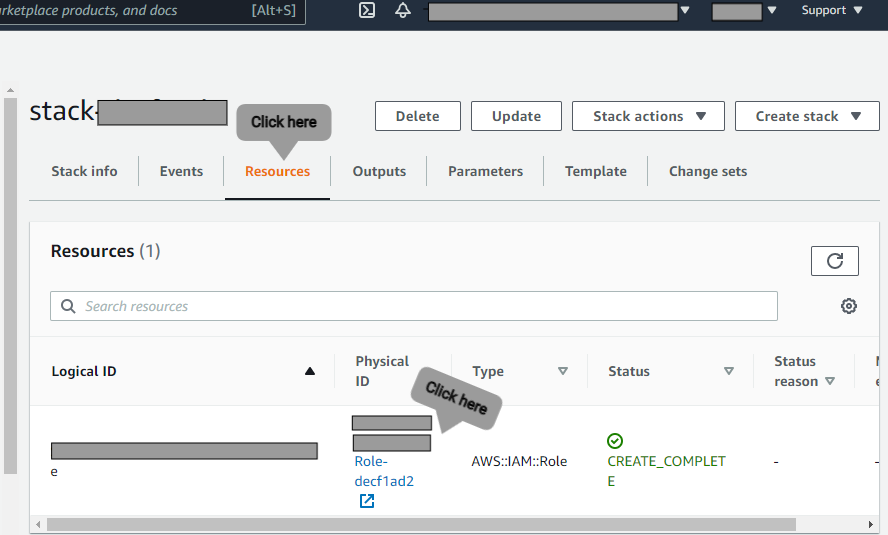
- In roles, you will get your Role ARN
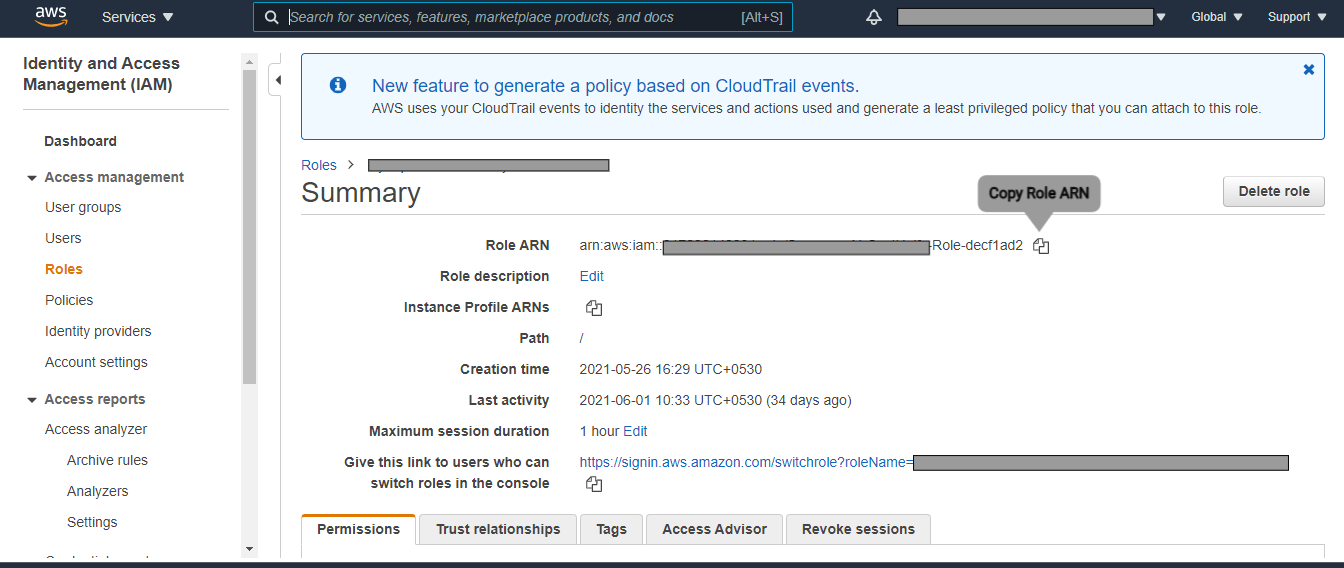
Step 5. Enter your Role ARN, connection display name and click on Connect AWS
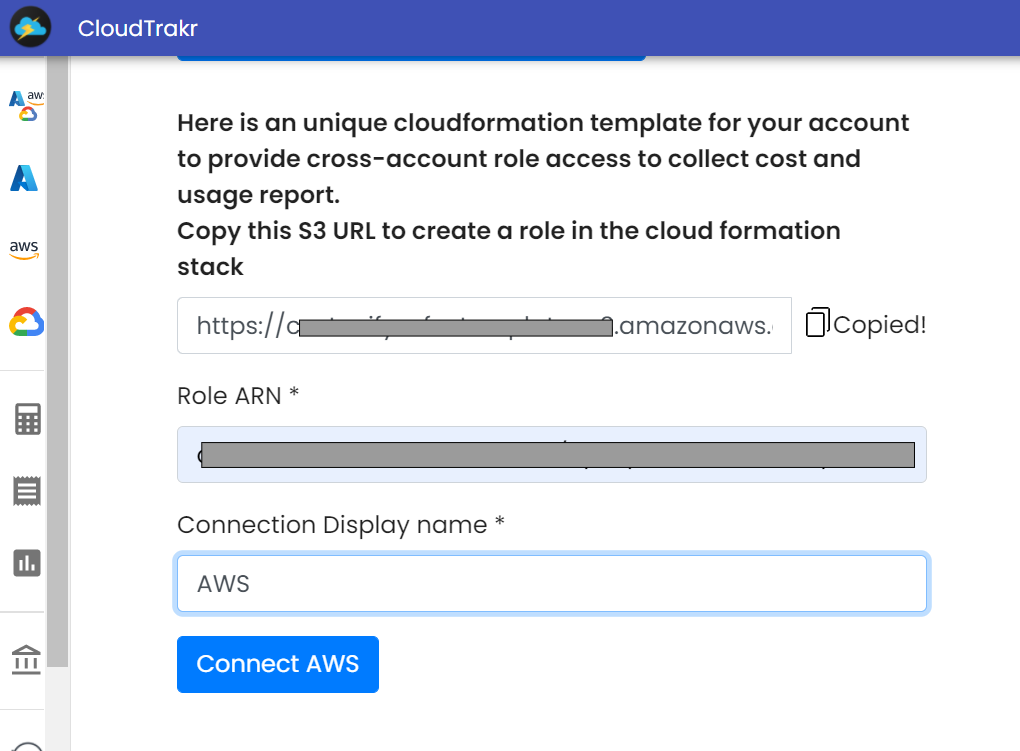
Your AWS Account is linked successfully in CloudTrakr. We will collect the billing data and the data will be available within 24 hours both in web and mobile.
The following 2 policies will be created and attached to this IAM role to securely access the cost and usage report in the S3 bucket in your Management or master account that provides access to all the member or linked accounts, and read-only access to your resources to help analyze and optimize the costs.
1. Policy Name: CloudTrakr-Custom-ResourceMonitoring-Policy
{

    "Version": "2012-10-17",

    "Statement": [

        {

            "Action": [

                "cur:DescribeReportDefinitions",

                "eks:Describe*",

                "eks:List*",

                "organizations:Describe*",

                "organizations:List*",

                "ecs:ListClusters",

                "ecs:ListServices",

                "ec2:DescribeInstances",

                "cloudwatch:GetMetricData",

                "ecs:ListTasks",

                "ecs:ListContainerInstances",

                "ecs:DescribeTasks"

            ],

            "Resource": "*",

            "Effect": "Allow",

            "Sid": "CostUnifyCustomResourceMonitoringPolicy20201009"

        }

    ]

}
2. Policy Name: CloudTrakr-Custom-S3-Policy
{

    "Version": "2012-10-17",

    "Statement": [

        {

            "Action": [

                "s3:GetBucketLocation",

                "s3:ListBucket",

                "s3:GetObject"

            ],

            "Resource": [

                "arn:aws:s3:::synapsesai-cost-usage",

                "arn:aws:s3:::synapsesai-cost-usage/*"

            ],

            "Effect": "Allow",

            "Sid": "CostUnifyCustomerS3Policy20201009"

        },

        {

            "Action": [

                "s3:ListBucket",

                "s3:PutObject",

                "s3:PutObjectAcl"

            ],

            "Resource": [

                "arn:aws:s3:::startrips-usage-bucket",

                "arn:aws:s3:::startrips-usage-bucket/*"

            ],

            "Effect": "Allow",

            "Sid": "CostUnifyS3Policy20201009"

        }

    ]

}
Copy the value from CrossAccountRoleArn key in the Outputs tab.

You need to enter this value in  Role ARN  to connect your AWS account in CloudTrakr application.